Quick-Start for JIRA Board Integration
- Patrick Lehrbach (Deactivated)
- Carsten Hilber
To become acquainted with the Resource Management Plugin please follow these first steps.
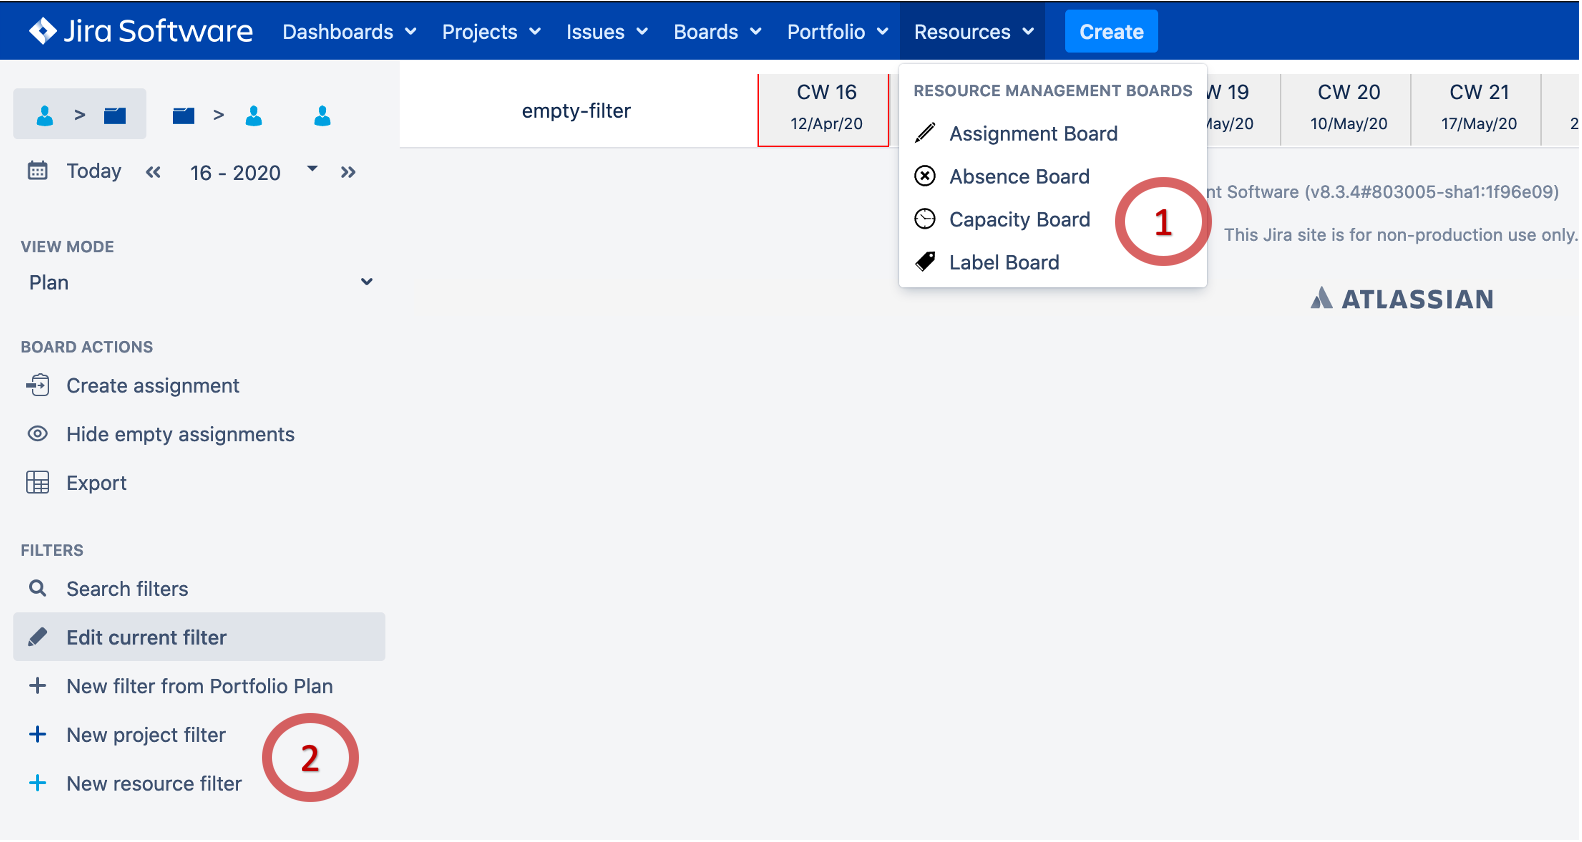
| Our first goal is to create a team and define some capacity for the team members. 1: Go to Capacity Board. 2: Create a new filter. |
(Click to enlarge)
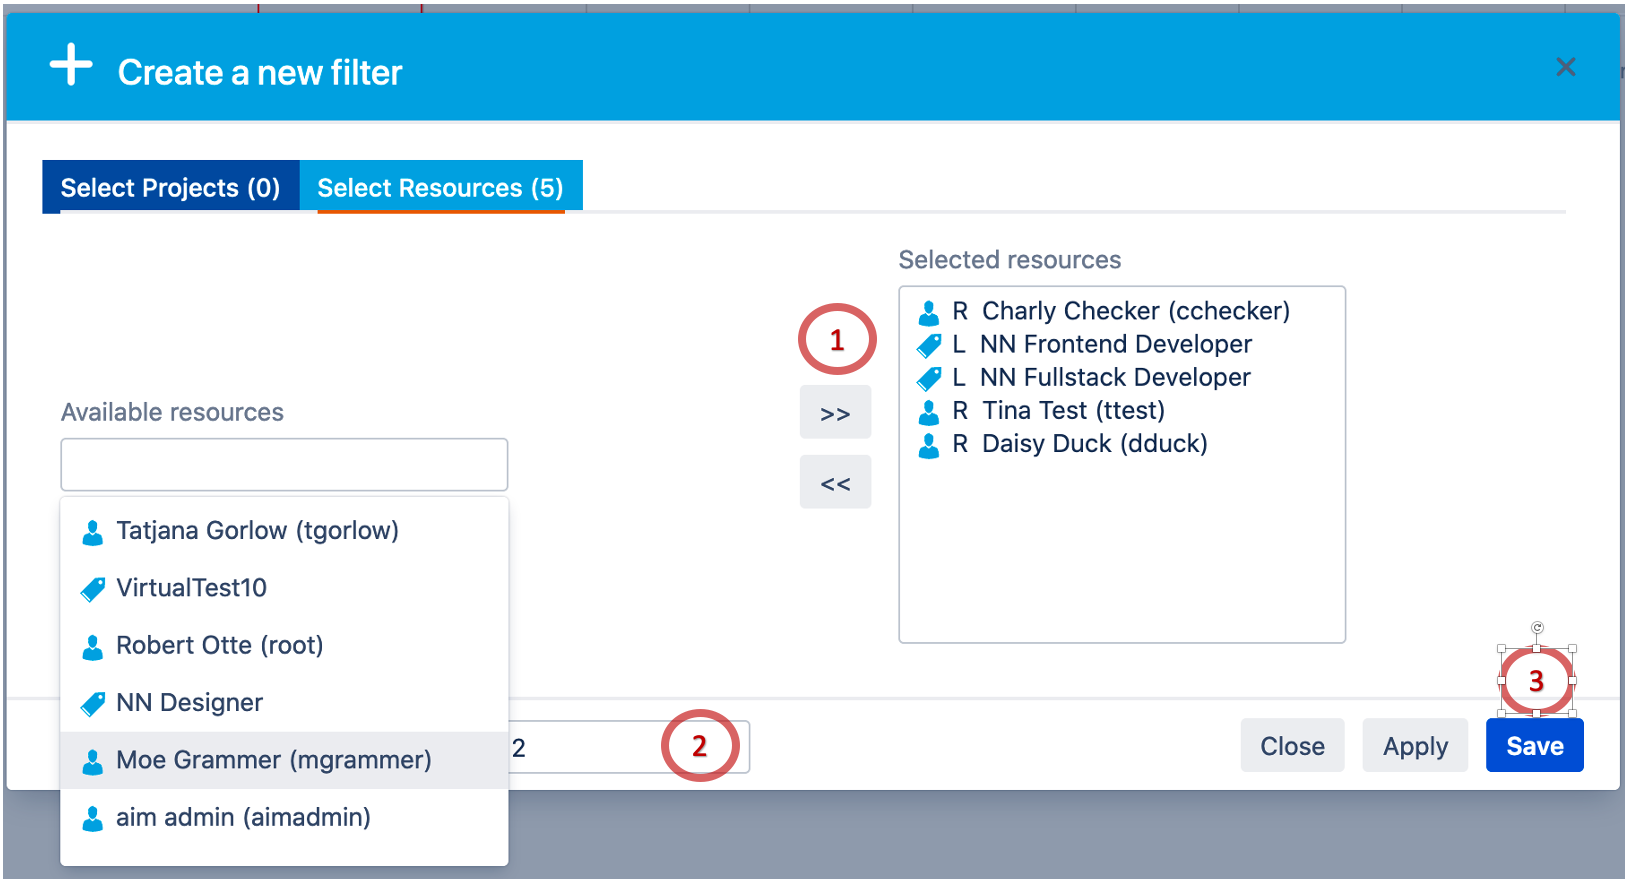
| 1: Select team members for this team in the popup dialog. 2: Think of a name for this filter, e.g. 'All internal ressources' 3: Save the filter. |
(Click to enlarge)
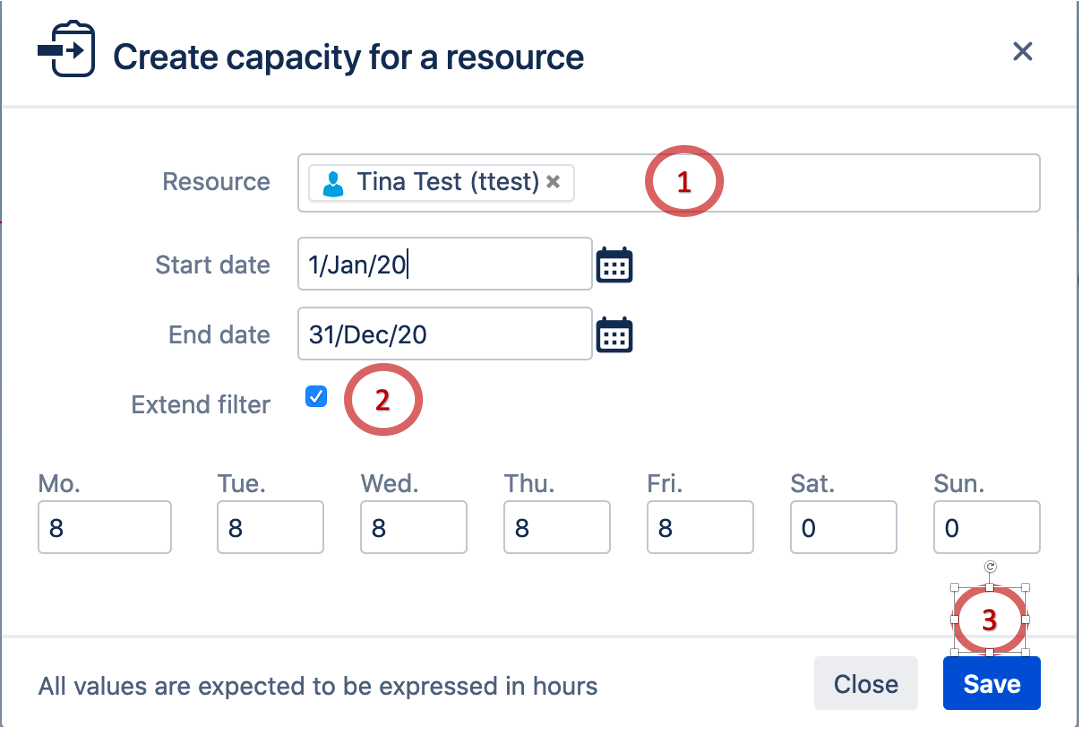
| Create a capacity entry for a team member* with the Create Capacity wizard (with extend filter option). 1: Select one or more ressources. 2: Ensure 'extend filter' option is set (If the selected ressource is not in the filter selection it will be added by this option). 3: Save the entries. |
(Click to enlarge) 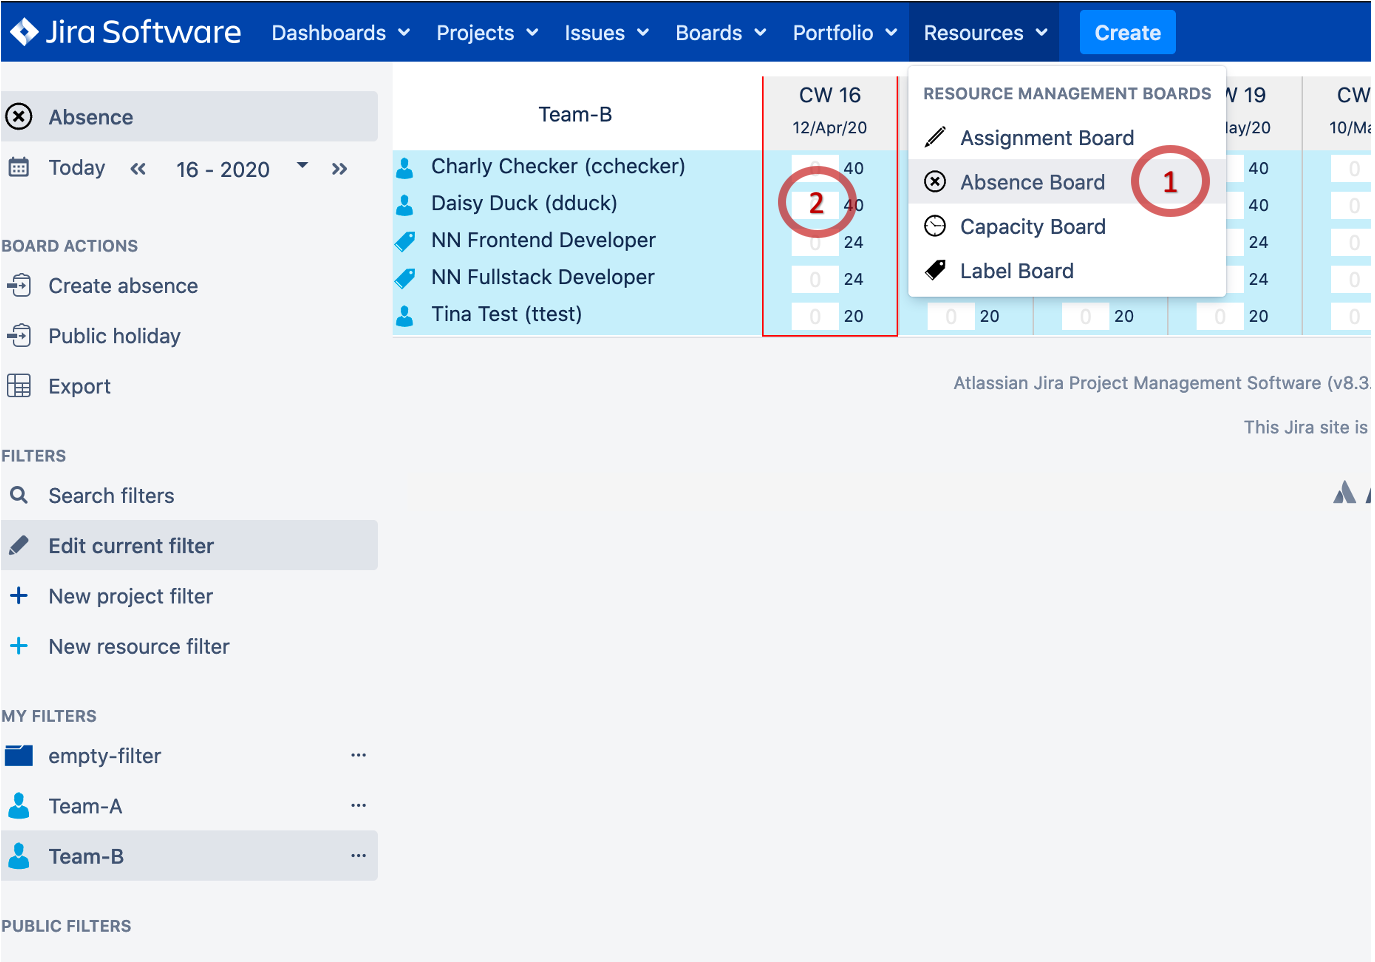 | Imagine your team members planned vacation or there are some public holidays. Absence time can be entered in the Absence board. 1: Go to Absence Board. 2: Create absence entries for the same team member(s)* directly in the board.
|
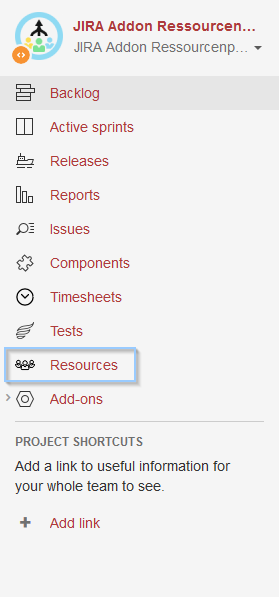
(Click to enlarge) | Now let's do some planning for our new team. Please go to a existing or new created JIRA Board. Select 'Resources' in the board menu.
|
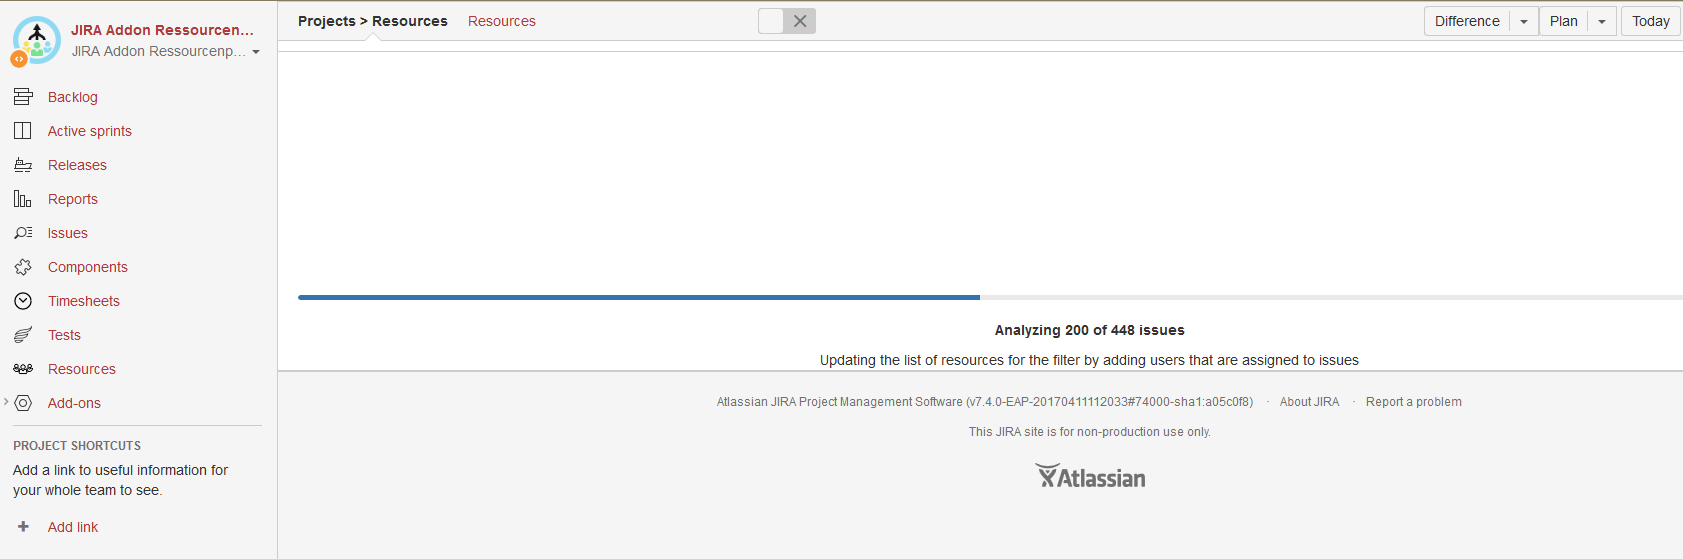
(Click to enlarge) | The issues will be analyzed and the list of resources for the filter is updated by adding users that are assigned to issues automatically.
|
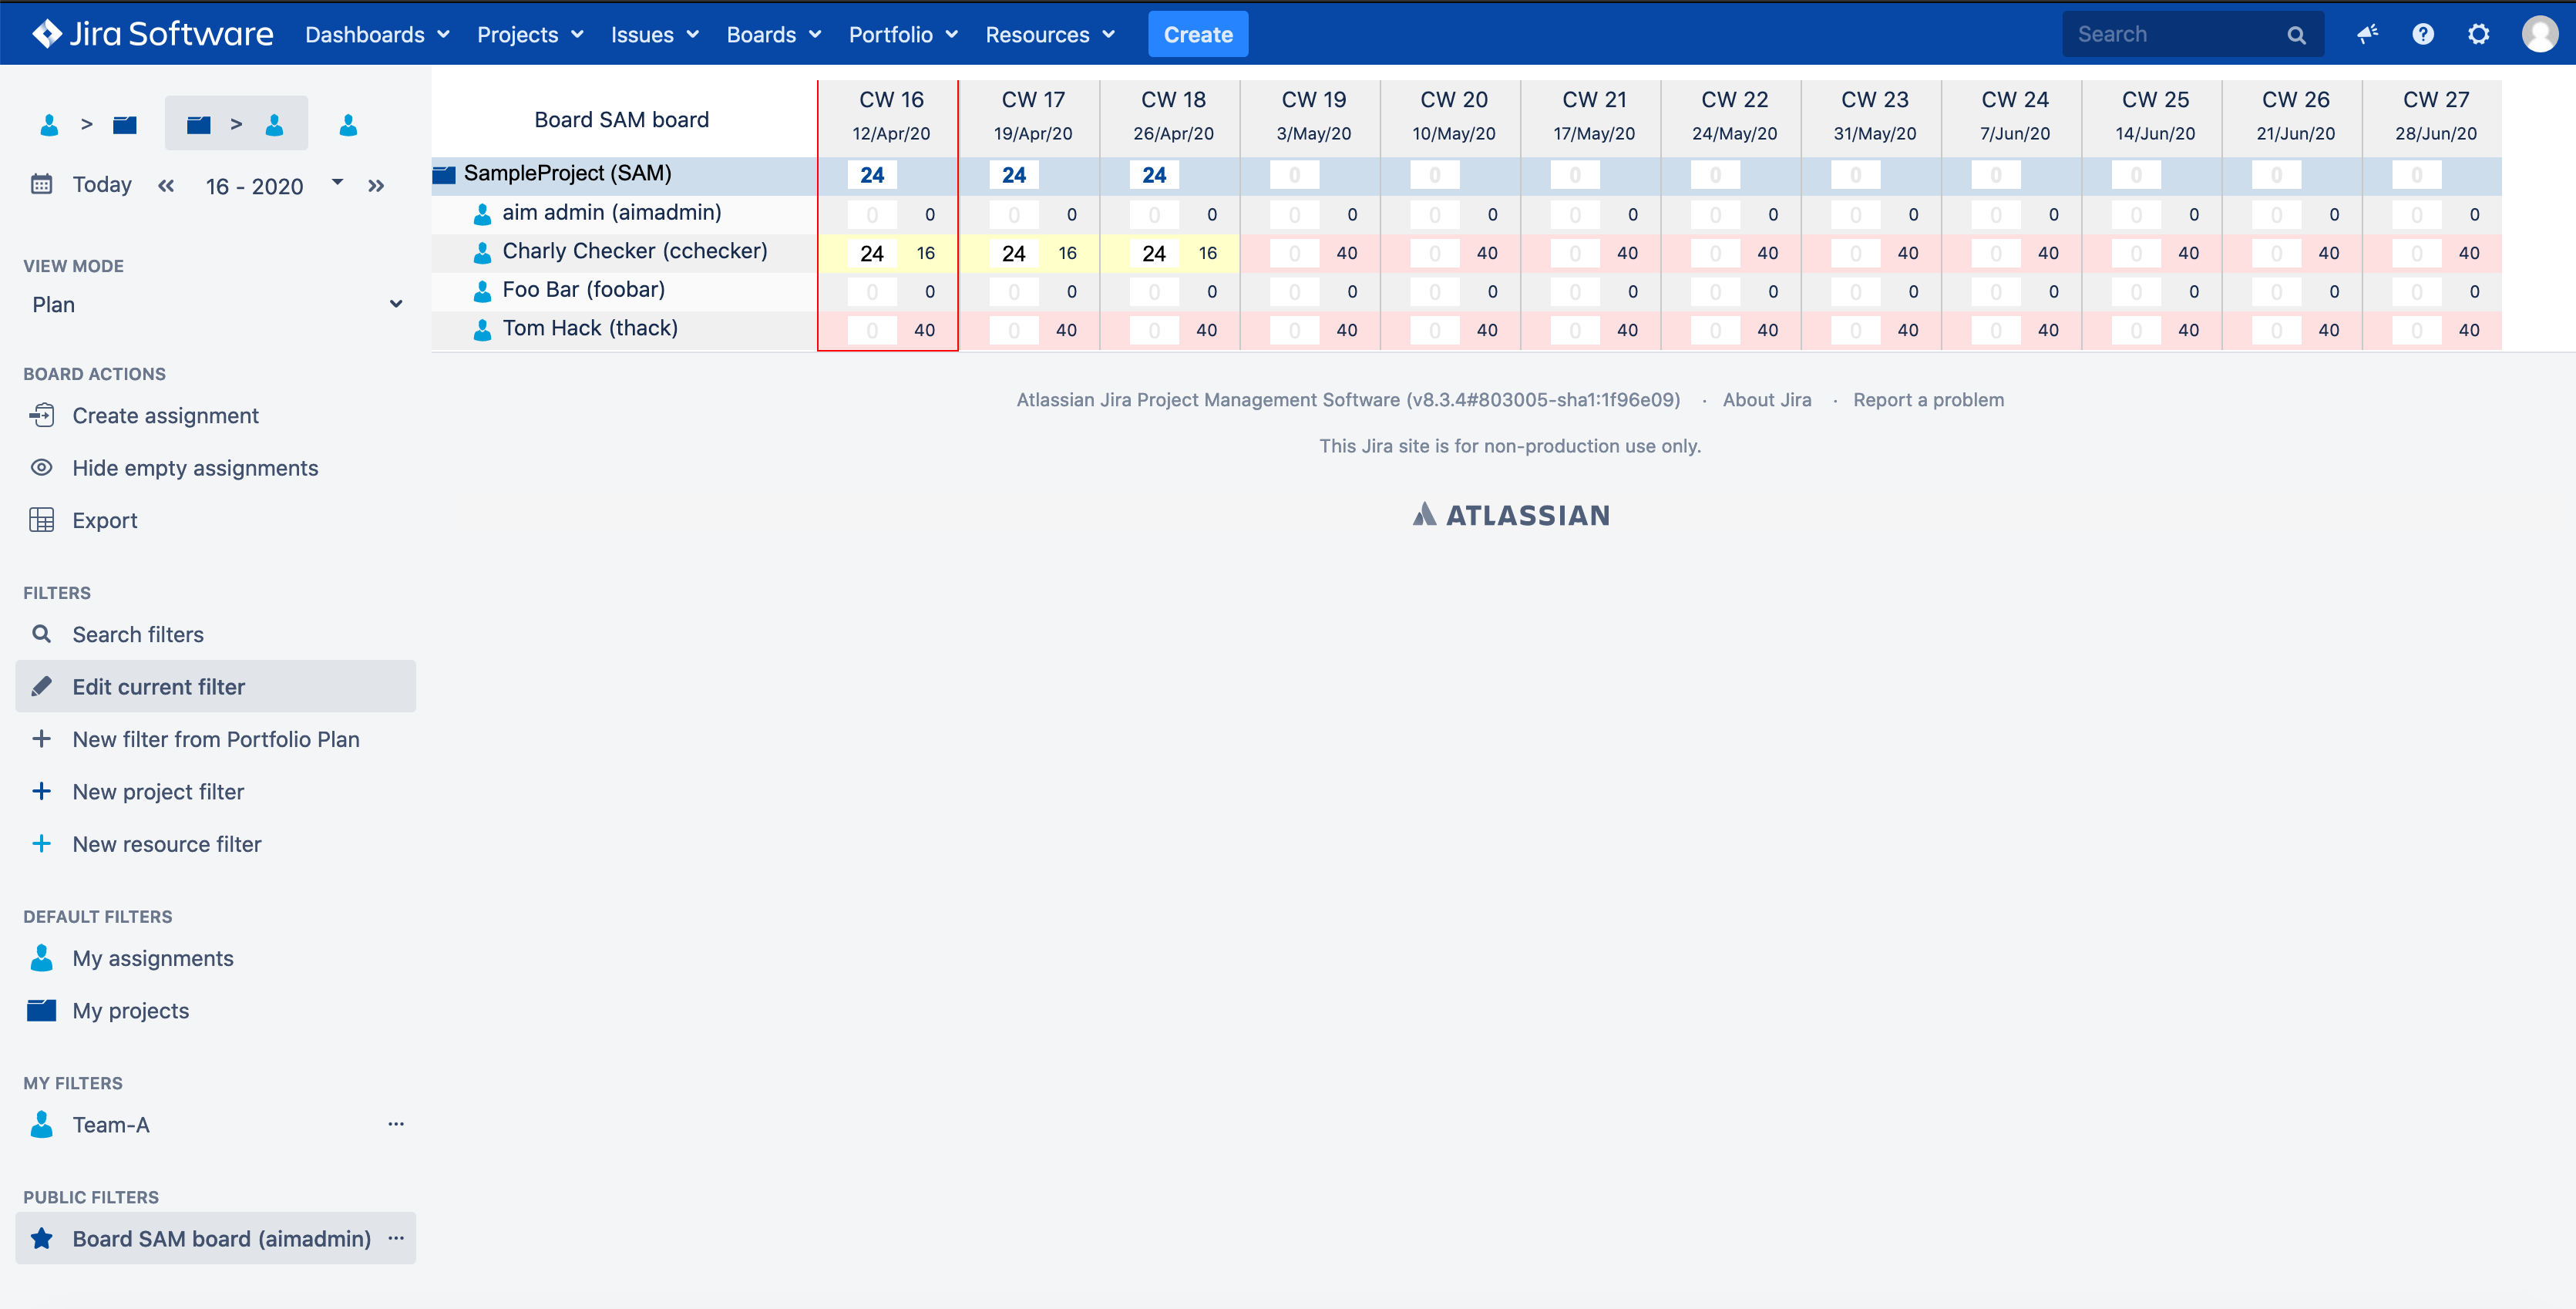
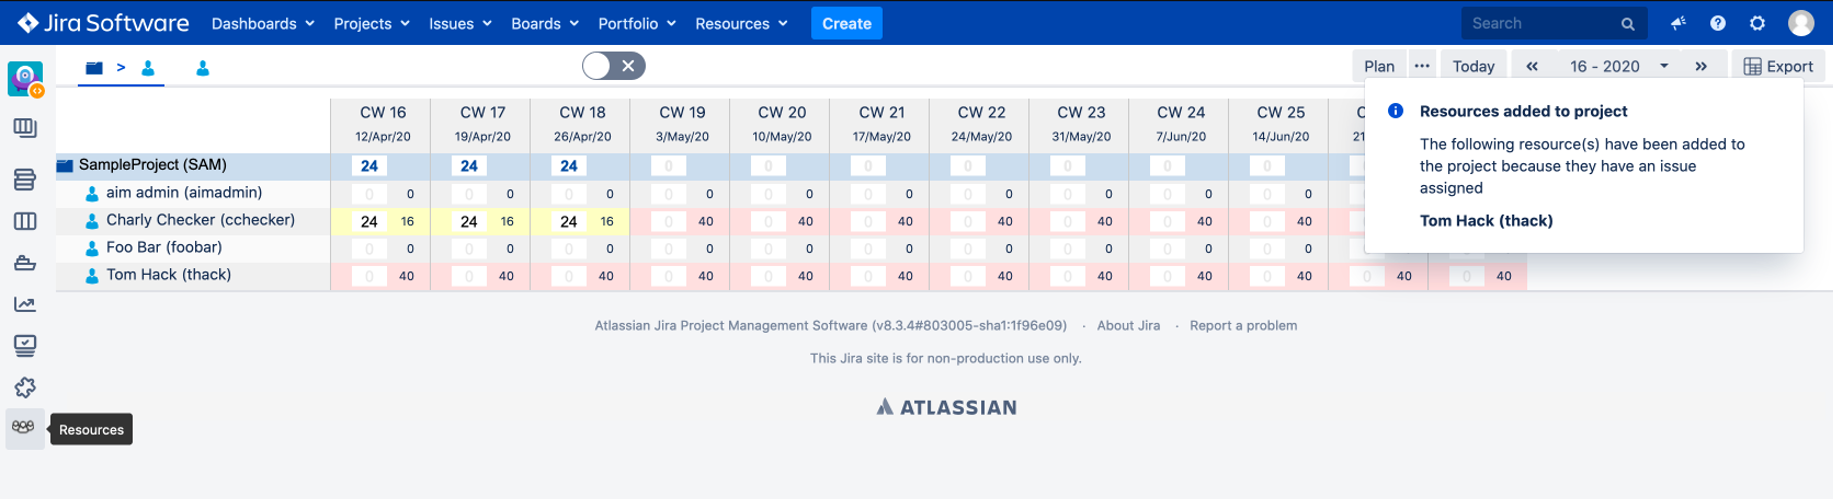 (Click to enlarge) | Now you can plan time for the resources for the project of the board directly wthin the board. You can see the availability of each resource per week as small figure. . |
(Click to enlarge)
| Go to the global Assignment Board. A new filter was created and updated automatically. The filter is also automatically published and available for other users of the global assignment board.
|
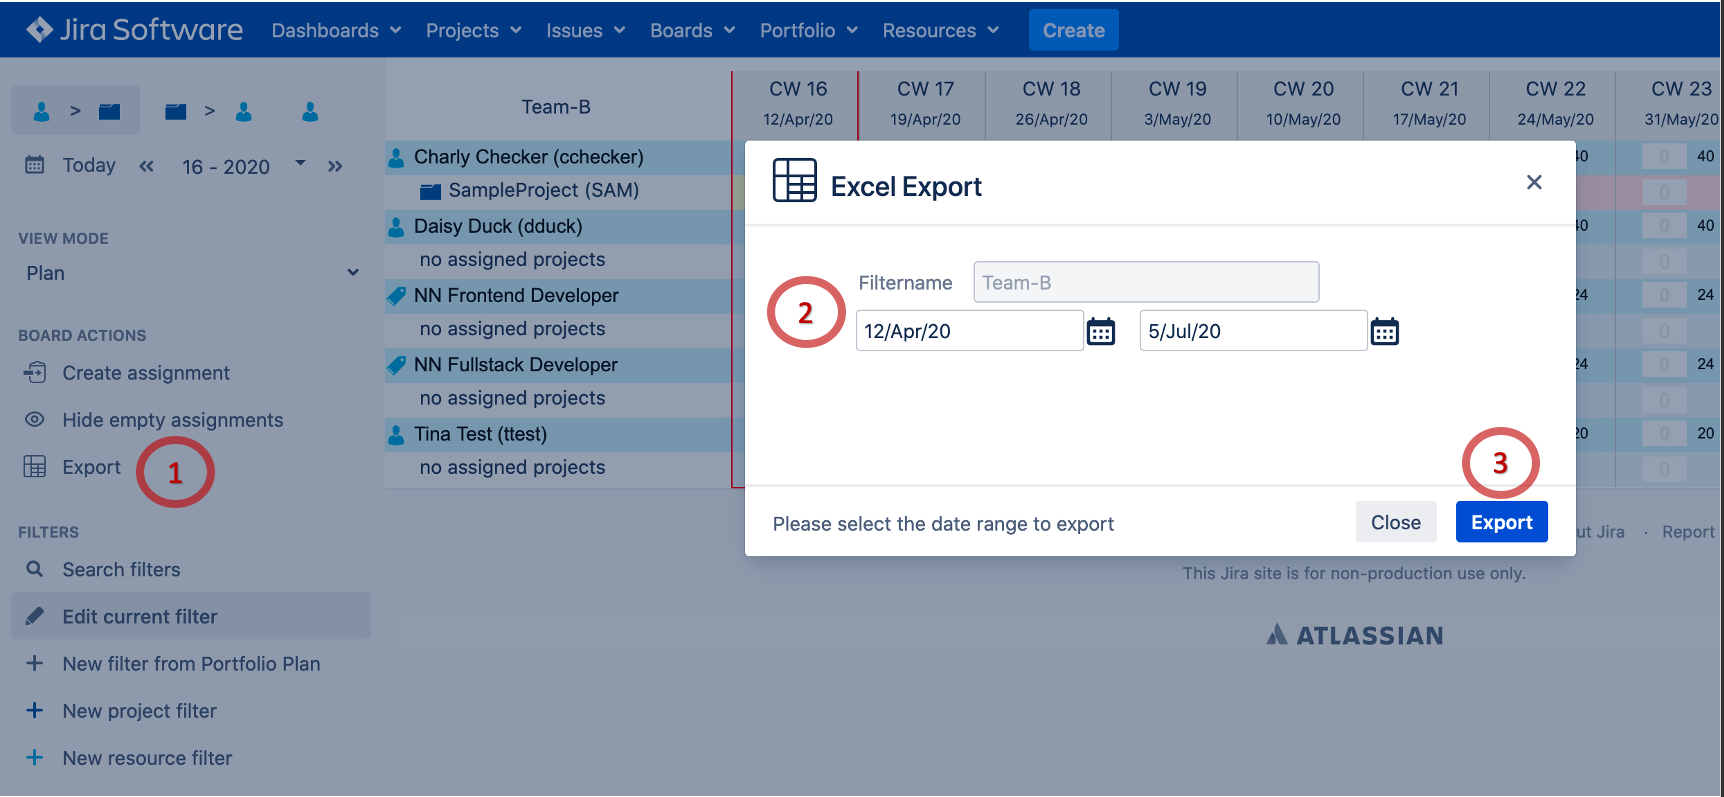
(Click to enlarge) | Please go back to the JIRA Board. Finally we can export our plan to an MS Excel sheet.
|