Quick-Start and Walk-Through
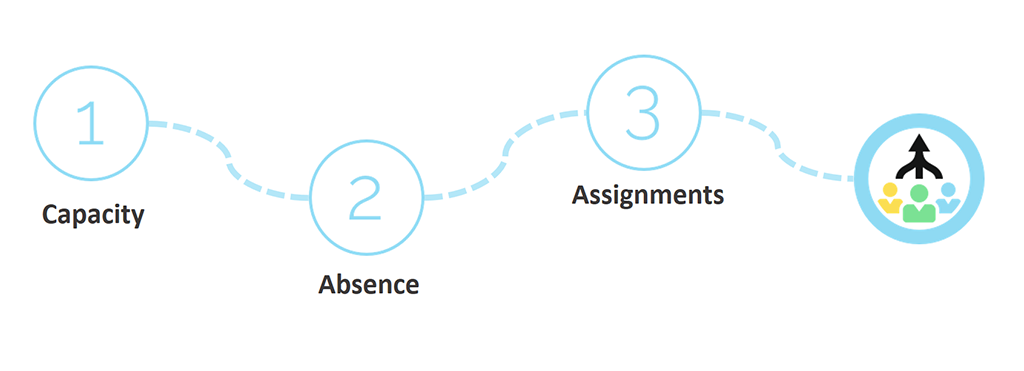
To become acquainted with the Resource Management Plugin please follow these first steps.
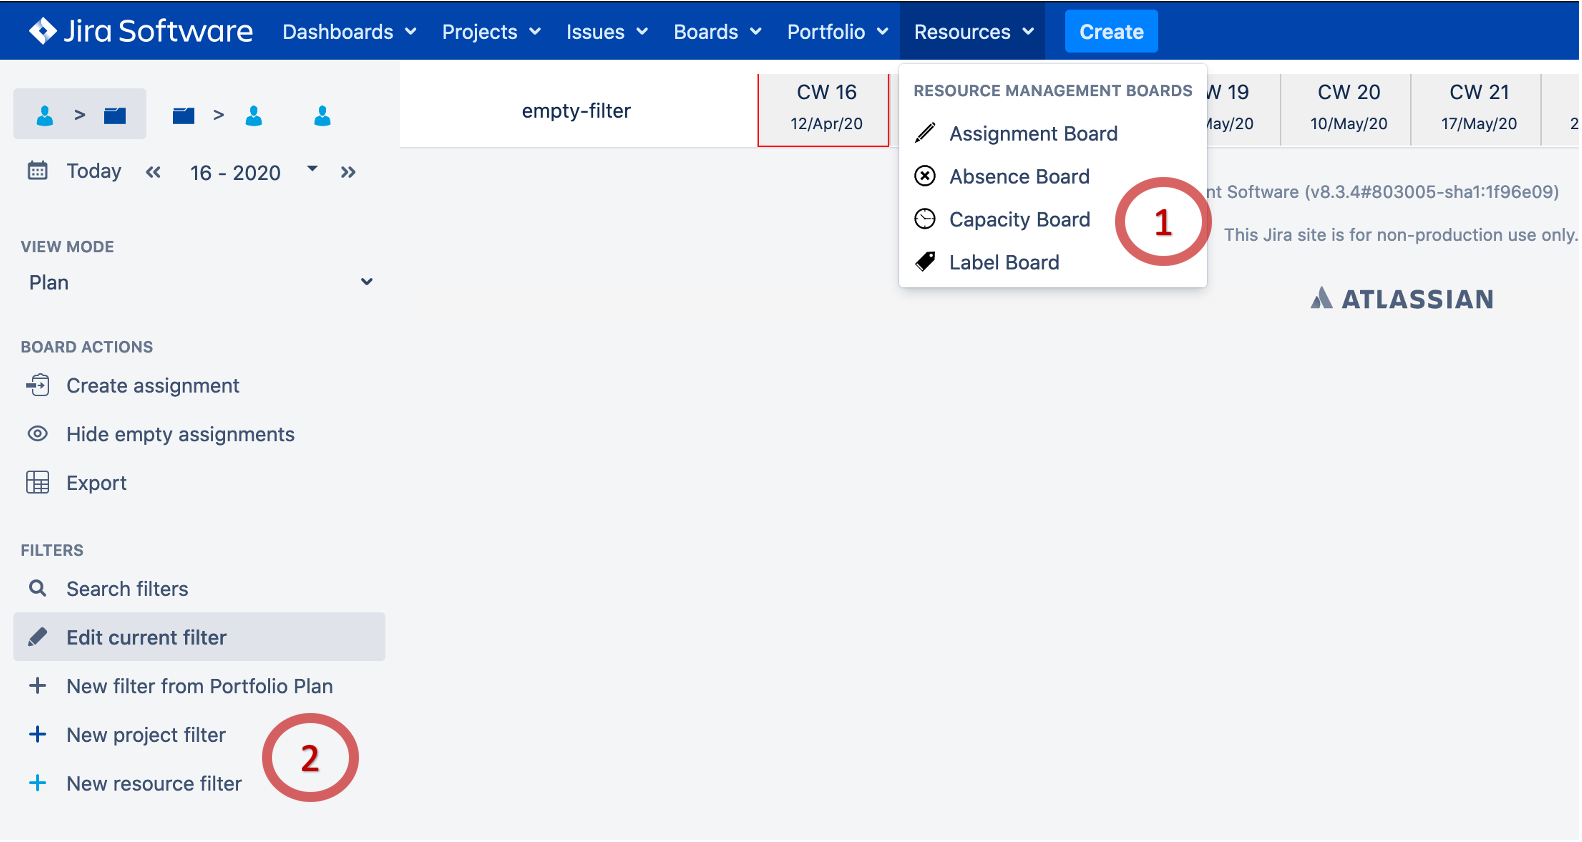
(Click to enlarge) | Our first goal is to create a team and define some capacity for the team members. 1: Go to Capacity Board. 2: Create a new filter. |
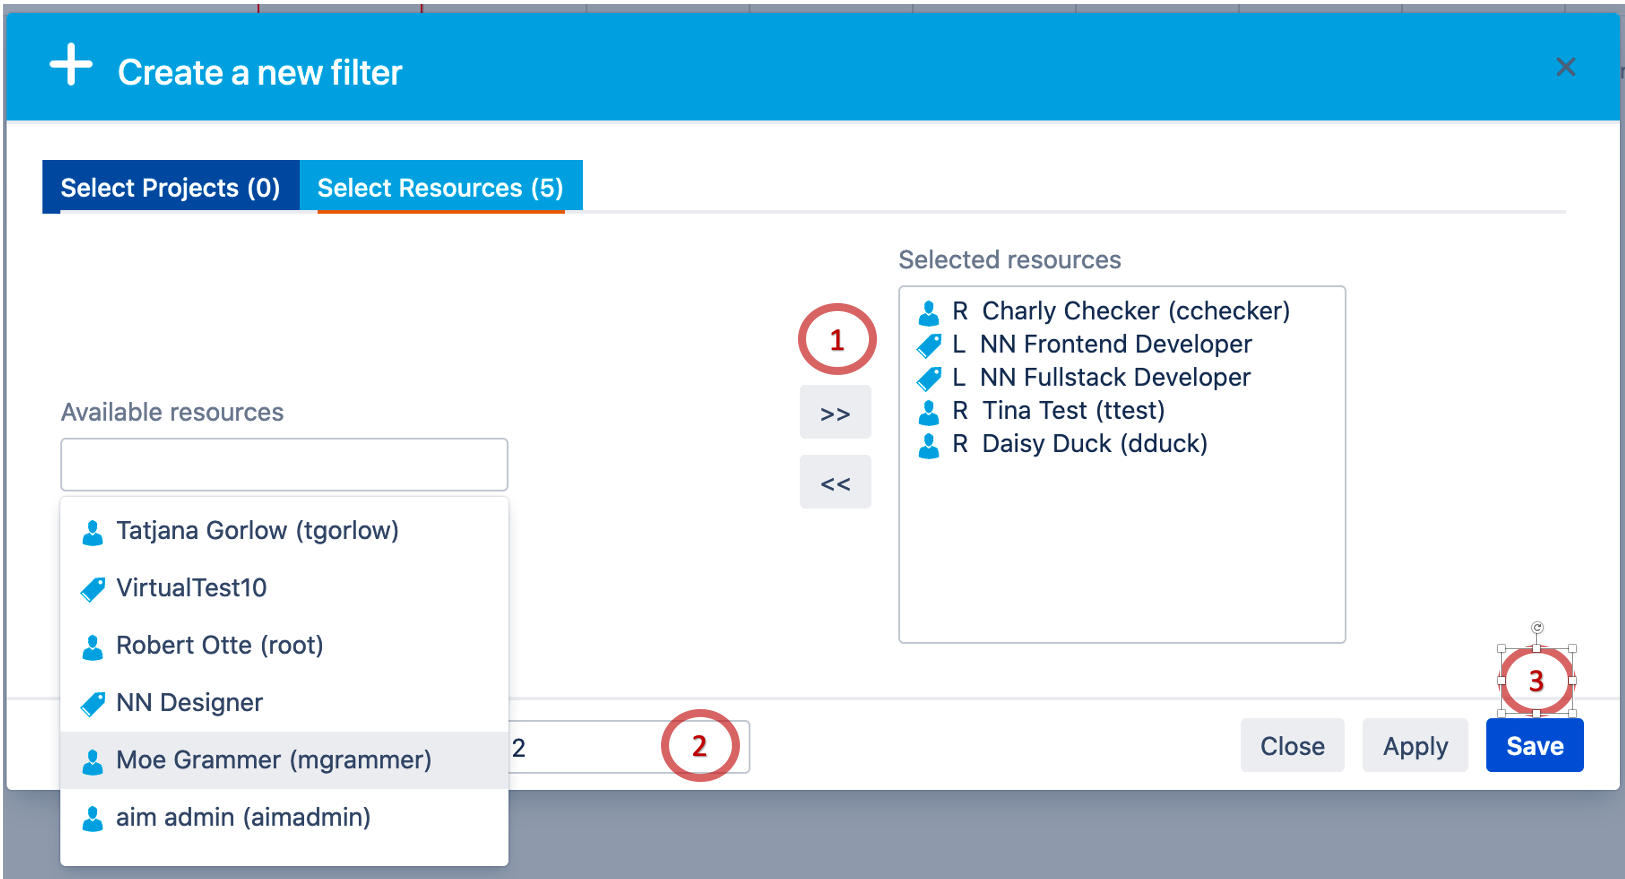
(Click to enlarge) | 1: Select team members for this team in the popup dialog. 2: Think of a name for this filter, e.g. 'All internal ressources' 3: Save the filter. |
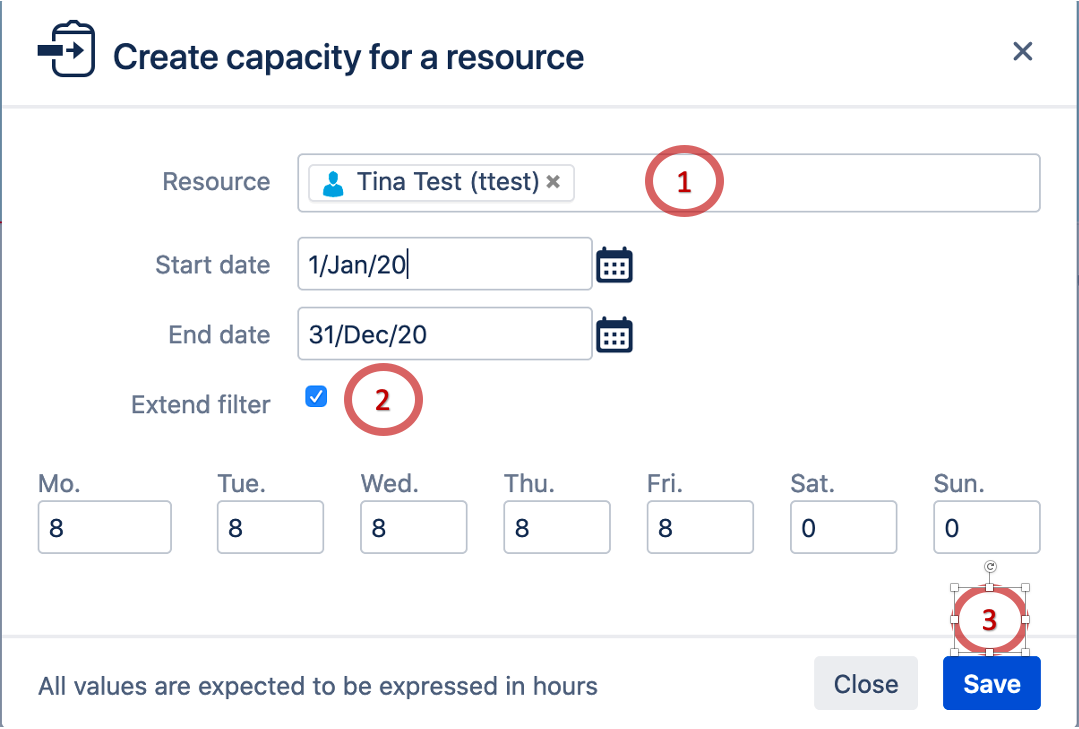
(Click to enlarge) | Create a capacity entry for a team member* with the Create Capacity wizard (with extend filter option). 1: Select a ressource. 2: Ensure 'extend filter' option is set (If the selected ressource is not in the filter selection it will be added by this option). 3: Save the entries. |
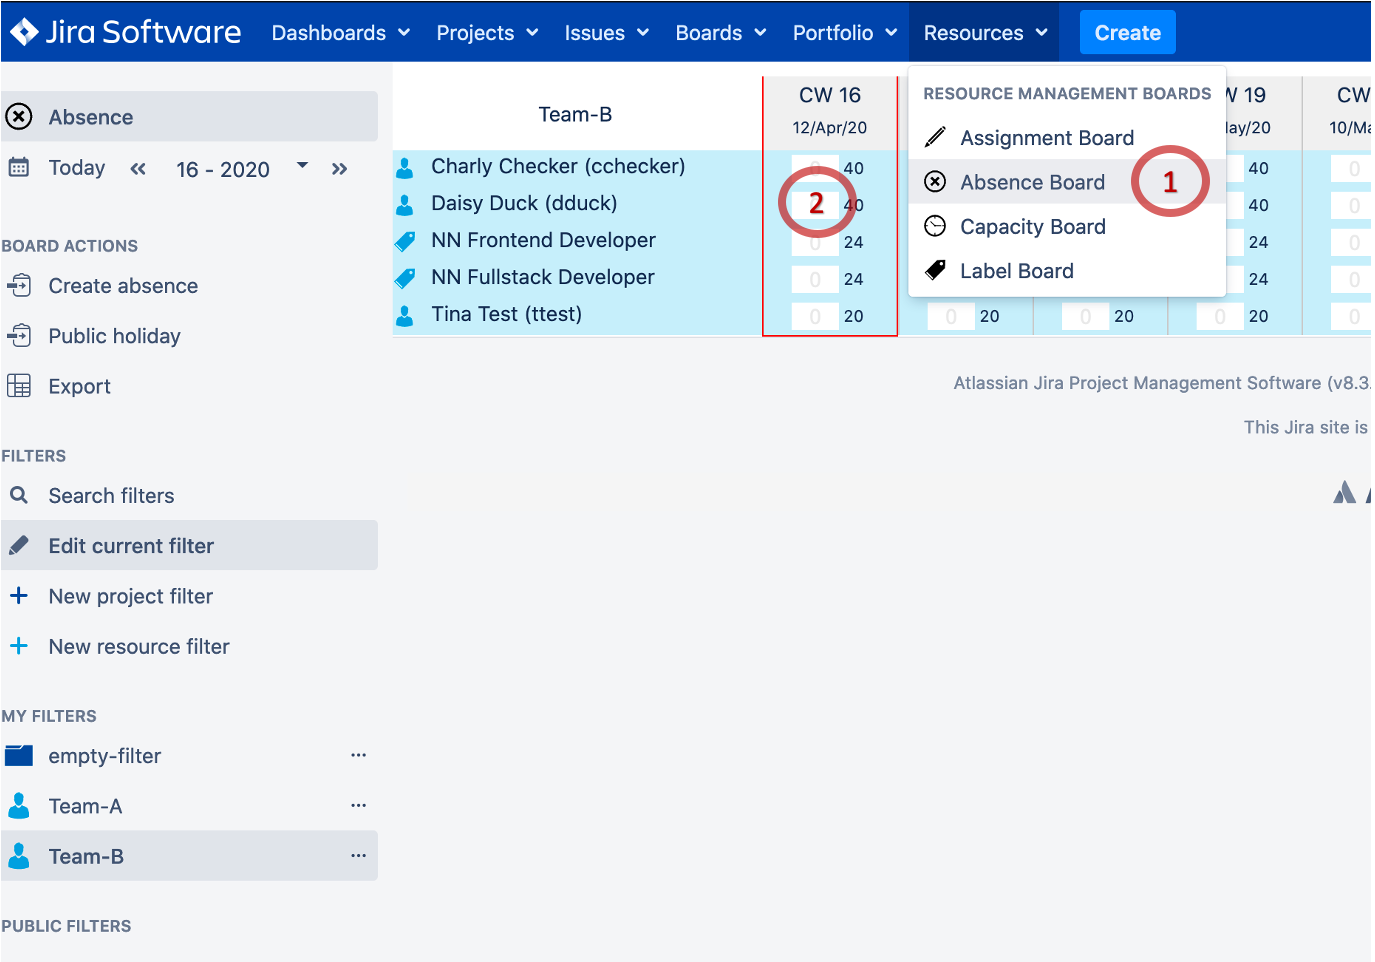
(Click to enlarge) | Imagine your team members planned vacation or there are some public holidays. Absence time can be entered in the Absence board. 1: Go to Absence Board. 2: Create absence entries for the same team member(s)* directly in the board.
|
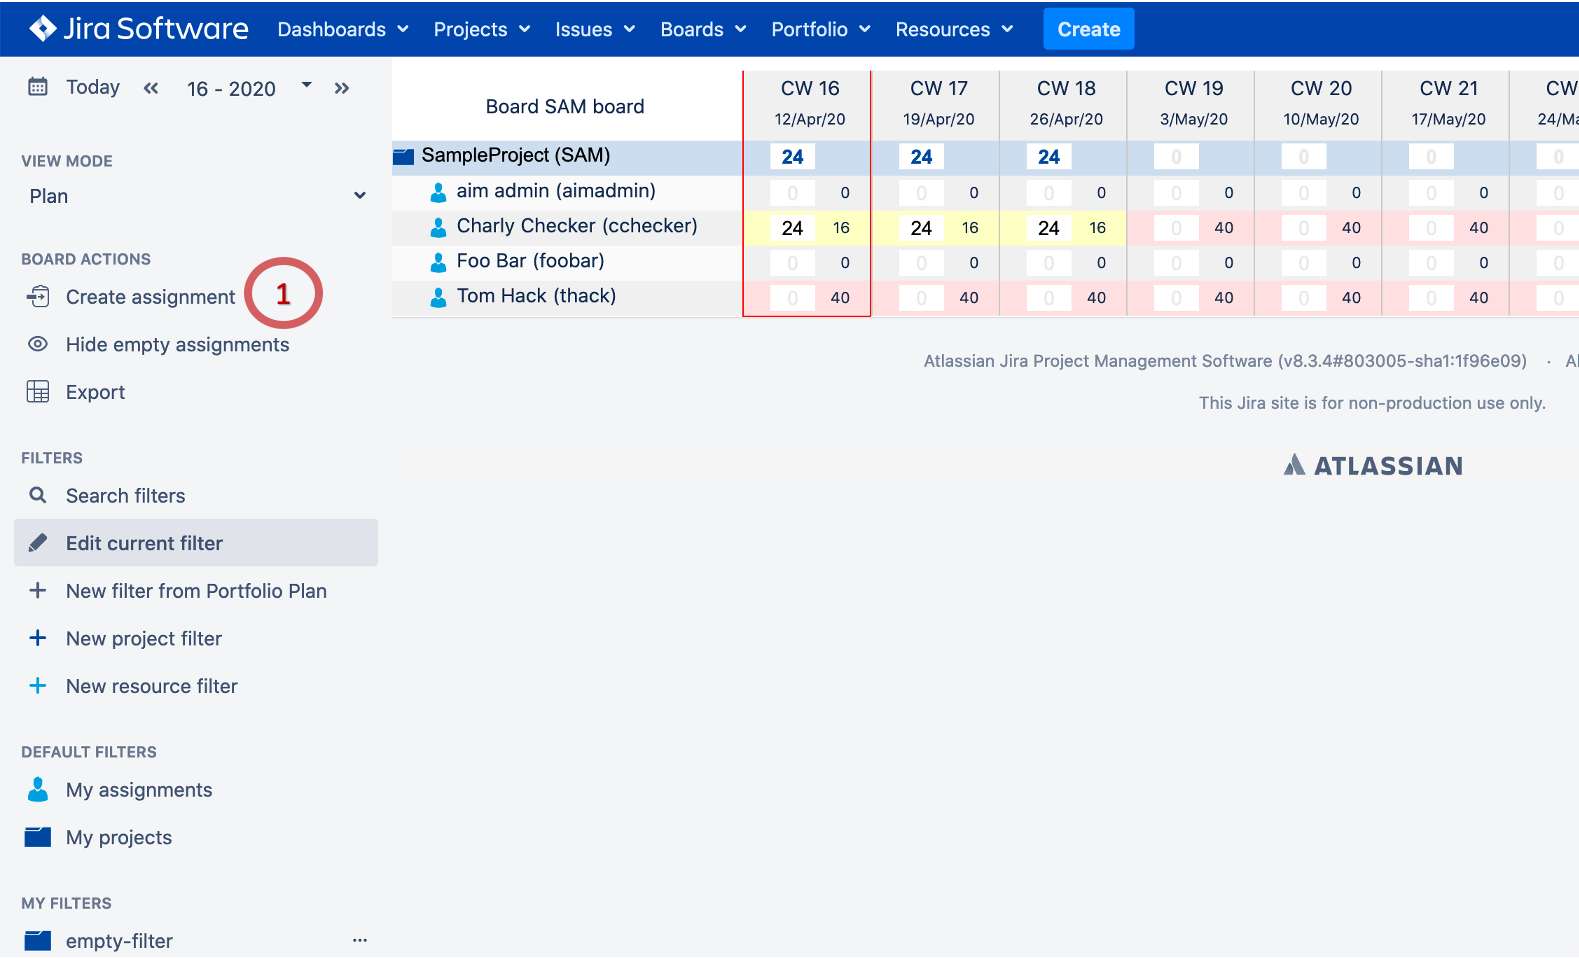
(Click to enlarge) | Now let's do some planning for our new team. Please go to Assignment Board. 1: Create an assignment for team member(s) on a project* with the Create Assignment wizard |
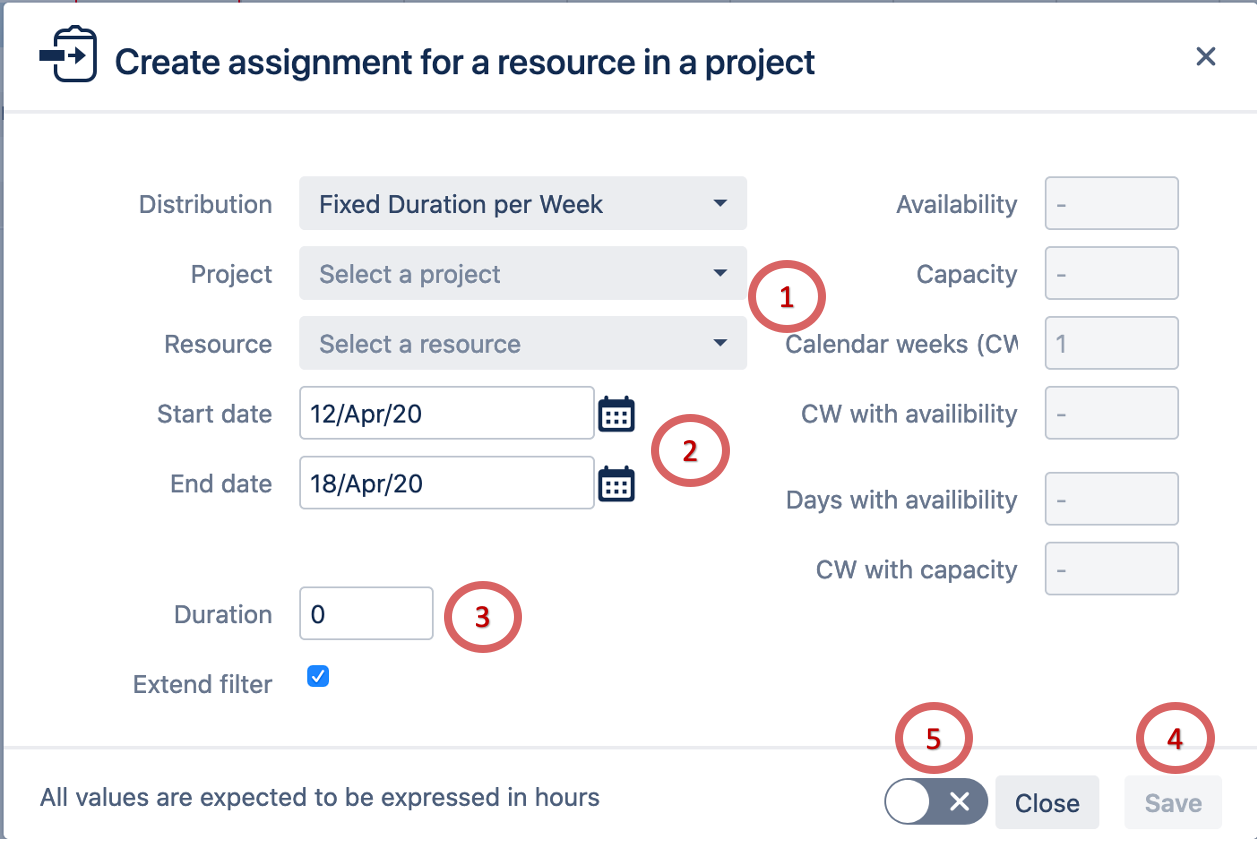
(Click to enlarge) | Create an assignment for team member on a project* with the Create Assignment wizard (with extend filter option). 1: Select a project* and a ressource* 2: Select a time frame 3: Select a duration 4: Save the assignment 5: Create another assignment: popup remains opened after save and context remains selected as well. This could be used to create similar assignments for multiple resources.
|
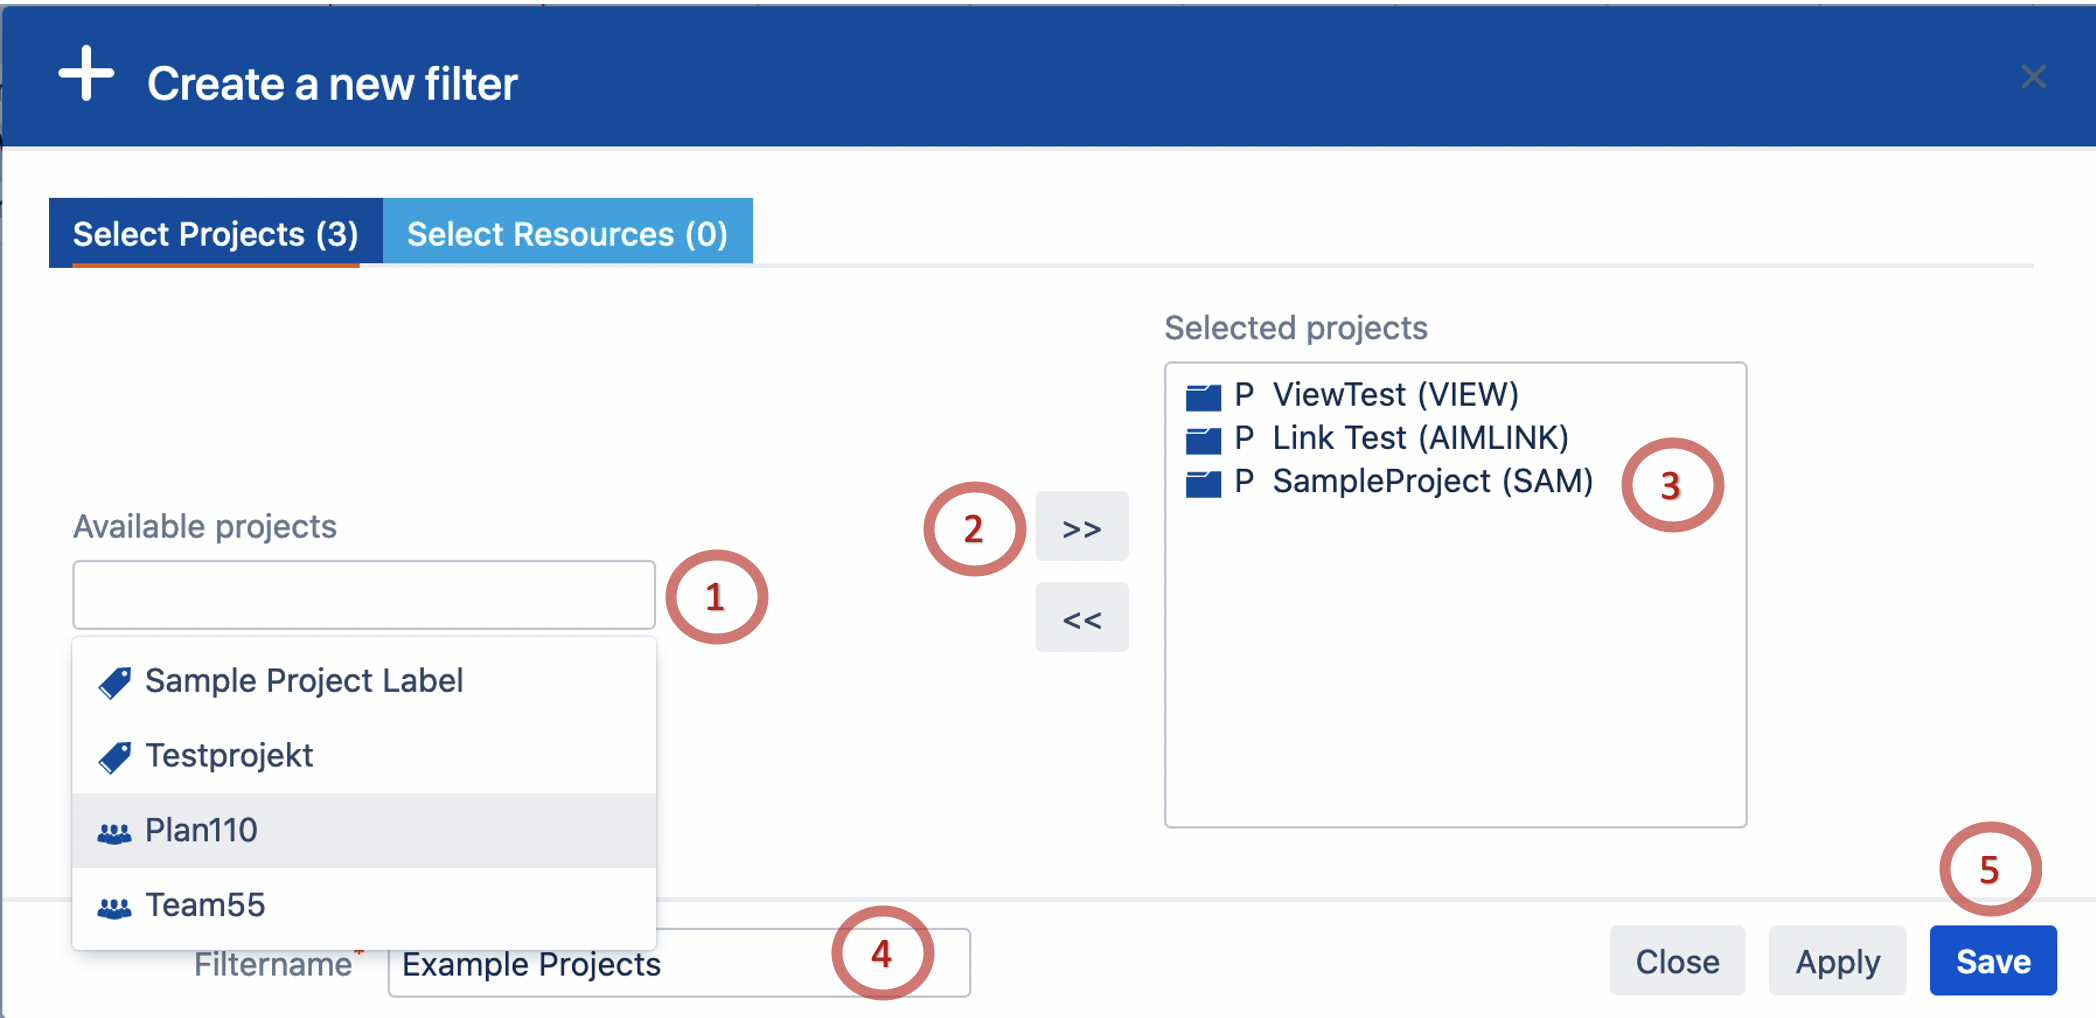
(Click to enlarge) | Create a filter for your first project with a click on 'Create project filter' in the siedebar 1: Select the project you created an assignment for in the previous step. 2: Add the selection to the filter by clicking the >> arrows. 3: Selected project should now be visible in the selected projects area. 4: Think of a name for the new filter 5: Save the filter
|
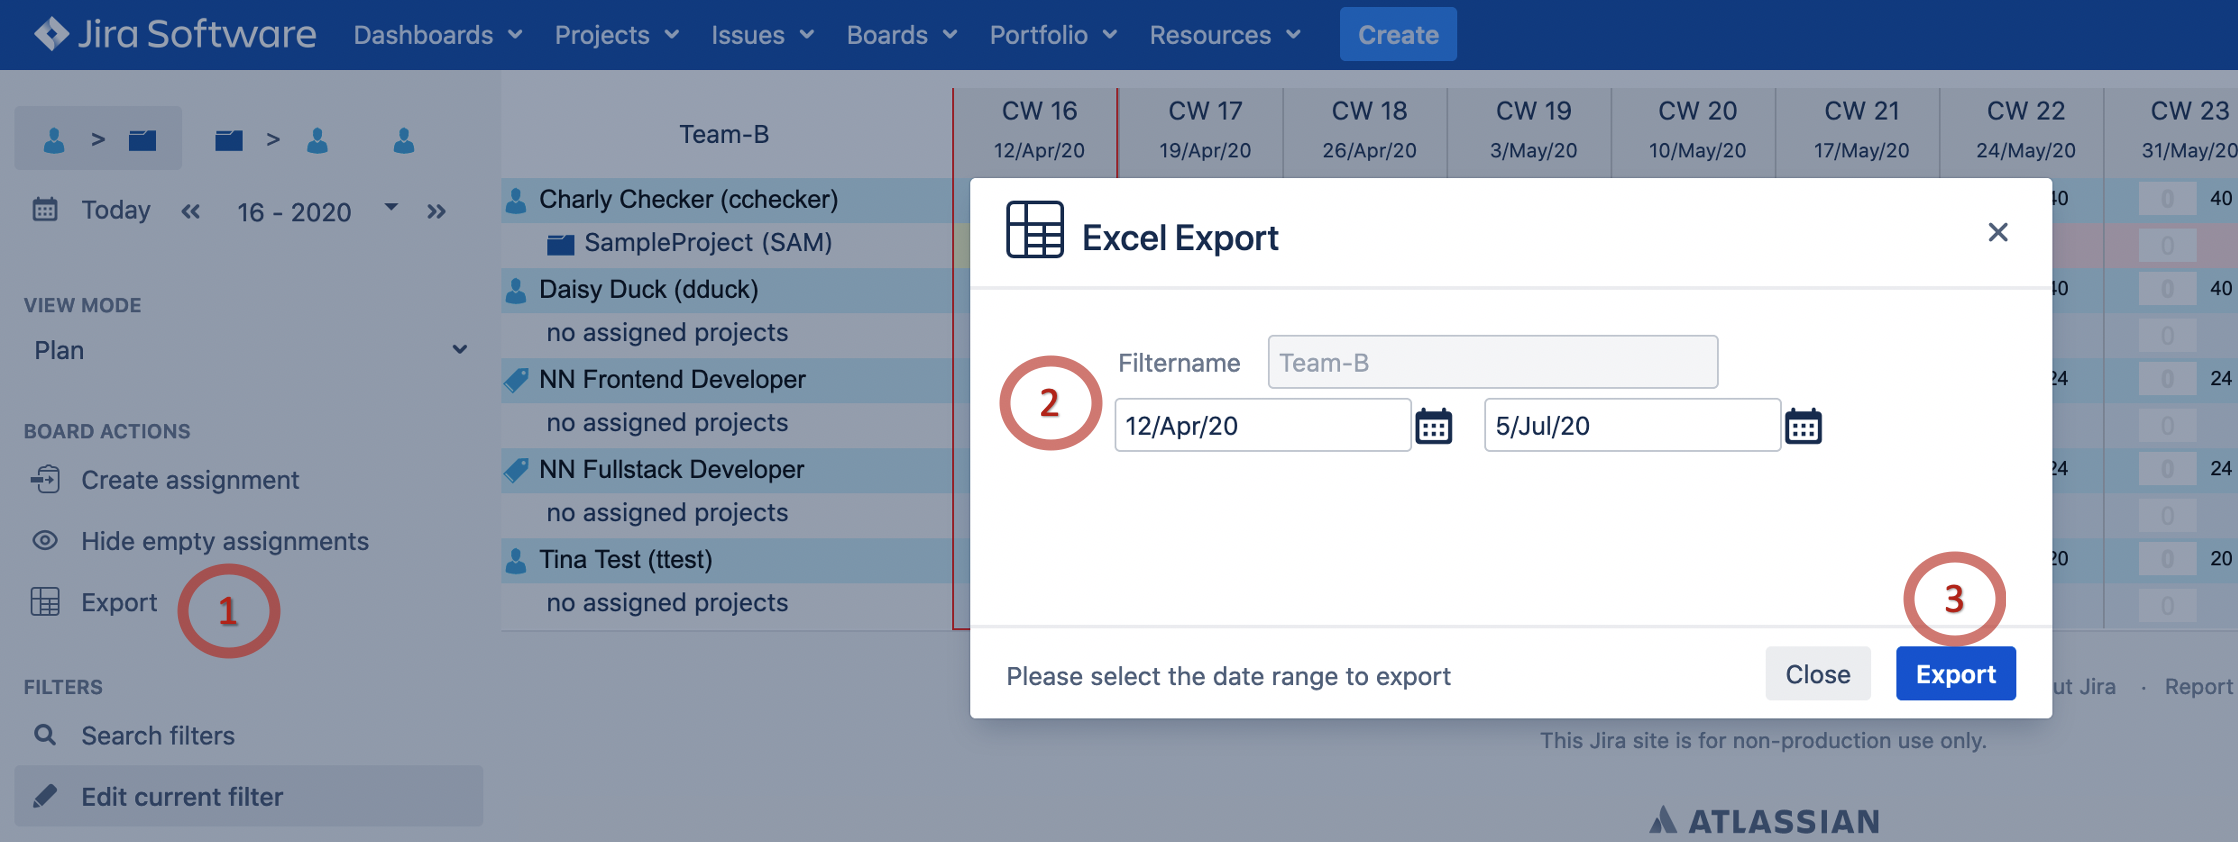
(Click to enlarge) | Finally we can export our plan to an MS Excel sheet. 1: Click on Export in the sidebar 2: Select a different time frame, board dates are preselected. 3: Export assignment values to MS Excel.
|
* Visibility of projects and resources depends on the following aspects:
- Restrictions in the Resource Management plugin configuration (- initially after setup there are no restrictions).
- For creation of assignments only JIRA users assigned to projects will be visible, you can configure labeled content and also get the Jira Portfolio extension from the marketplace to extend the content.
- For filtering of assignments only projects / resources for assignments already created will be shown.