Overview
Resource Filters can be applied to the Capacity Board and the Absence Board. There are two main areas:
- My Filters: Create your own personal filters.
- Public Filters: Share filters for others or subscribe to shared filters
My Filters - Create Filter
...
The filter concept was introduced to easily define content you want to see in just some seconds. You can also share the filters that you created with others, so that you all look on the same data.
Filters define the context of what will be shown in a board. However we define a filter, it always defines resources, no matter if directly or indirectly through assignments in projects or labels.
There are 3 ways you can specify the content.
|
1 or 2 Define a mixed project and resource filter |
The filters you define here are only shown for the person who created them. If you want to share the filters, you can publish them.
Define a resource filter
Directly add resources like team mates or labels to your filter. All projects that these resources are assigned to will automatically appear in the content.
| Info | ||
|---|---|---|
| ||
Use this option to automatically see newly assigned projects to a team. No need to update the filter, through the assignment new projects will automatically be added to the content |
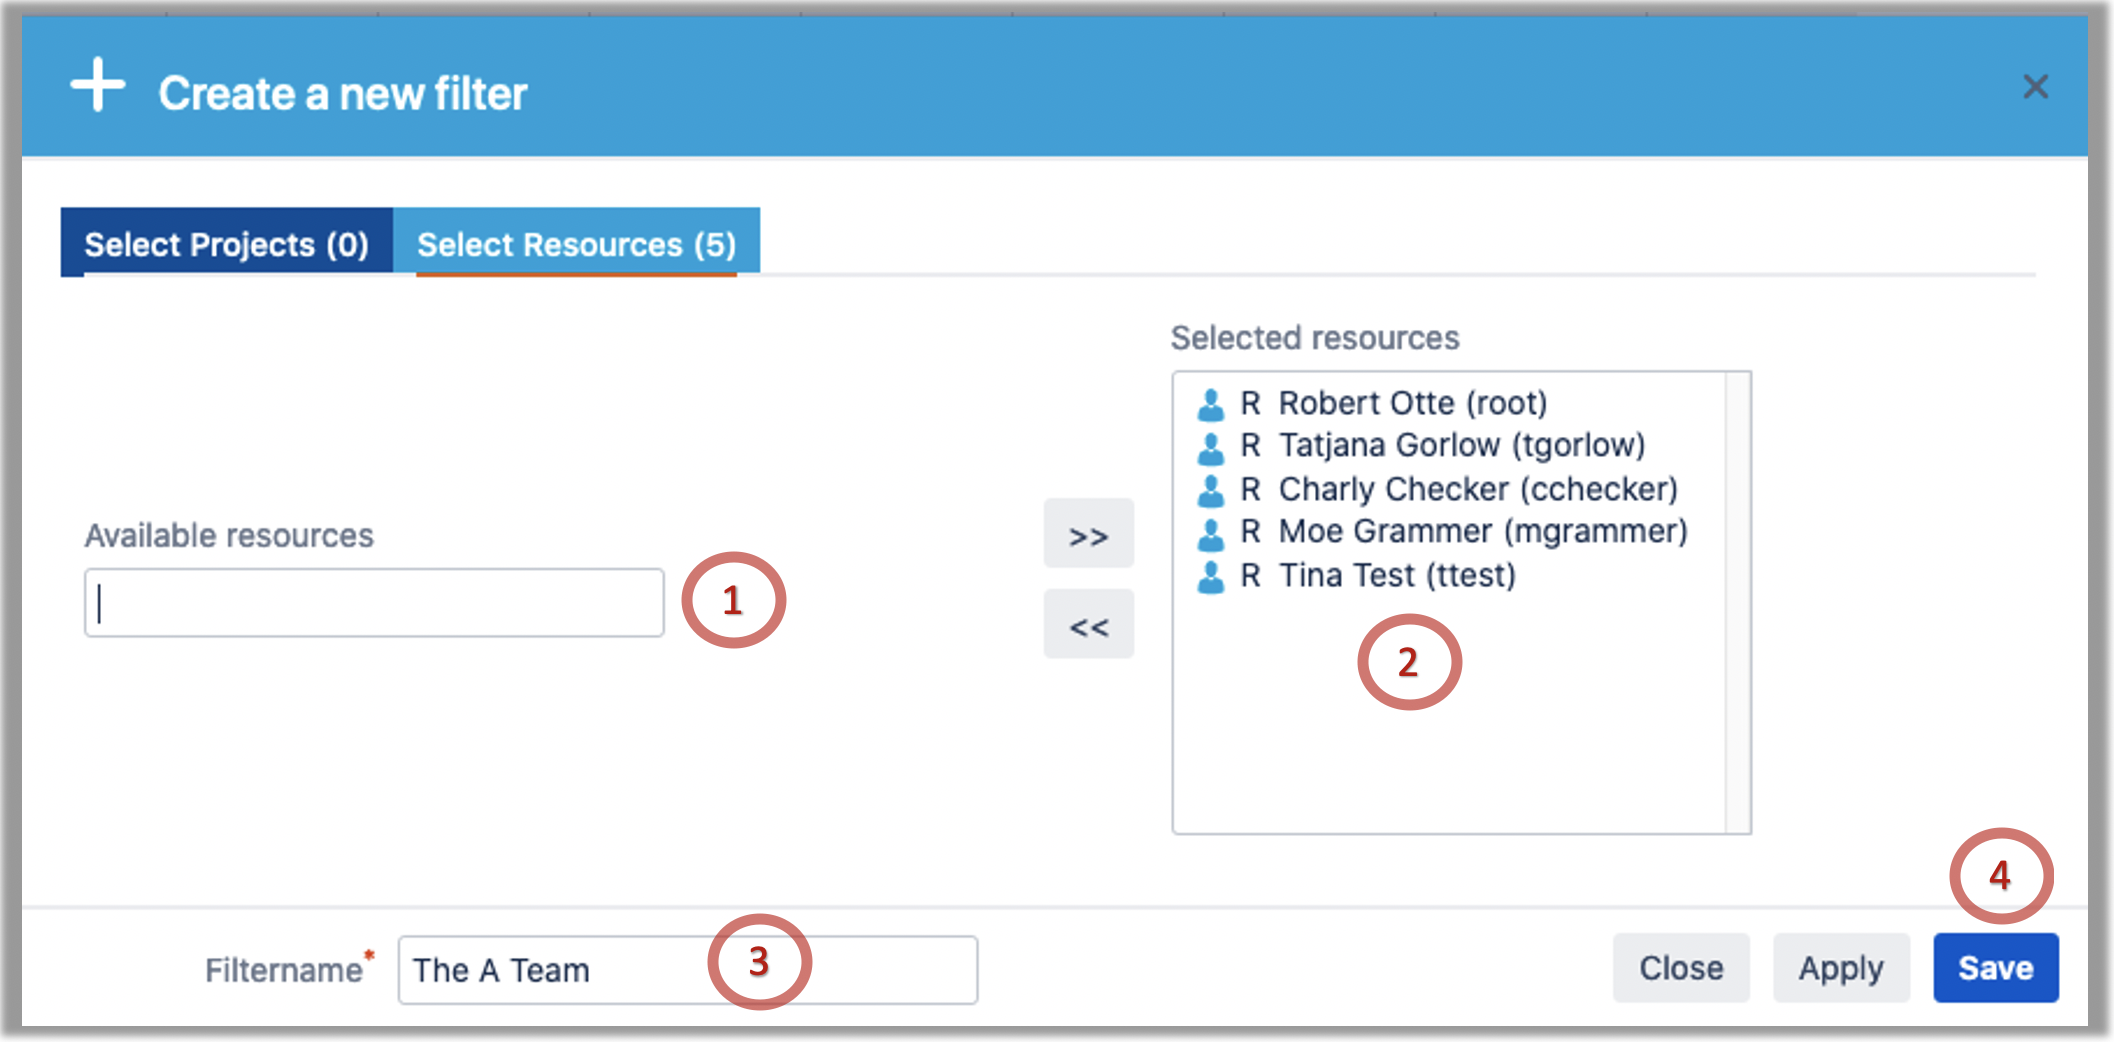 (Click to enlarge) | 1: Search for resources, see the administration section for detailed information on the content 2: Select one or several Resources out of the list and add them with the >> button. 3: Name for the defined Filter - mandatory to save / change the current Filter. 4: Either close (= cancel), apply (without saving) or save / change (and apply) the current Filter.
|
Define a project Filter
Directly add projects to your filter. All team members and labels that are assigned to these projects will automatically appear in the content.
| Info | ||
|---|---|---|
| ||
Use this option to automatically see newly added team members to a project. No need to update the filter, through the assignment new user will automatically be added to the content |
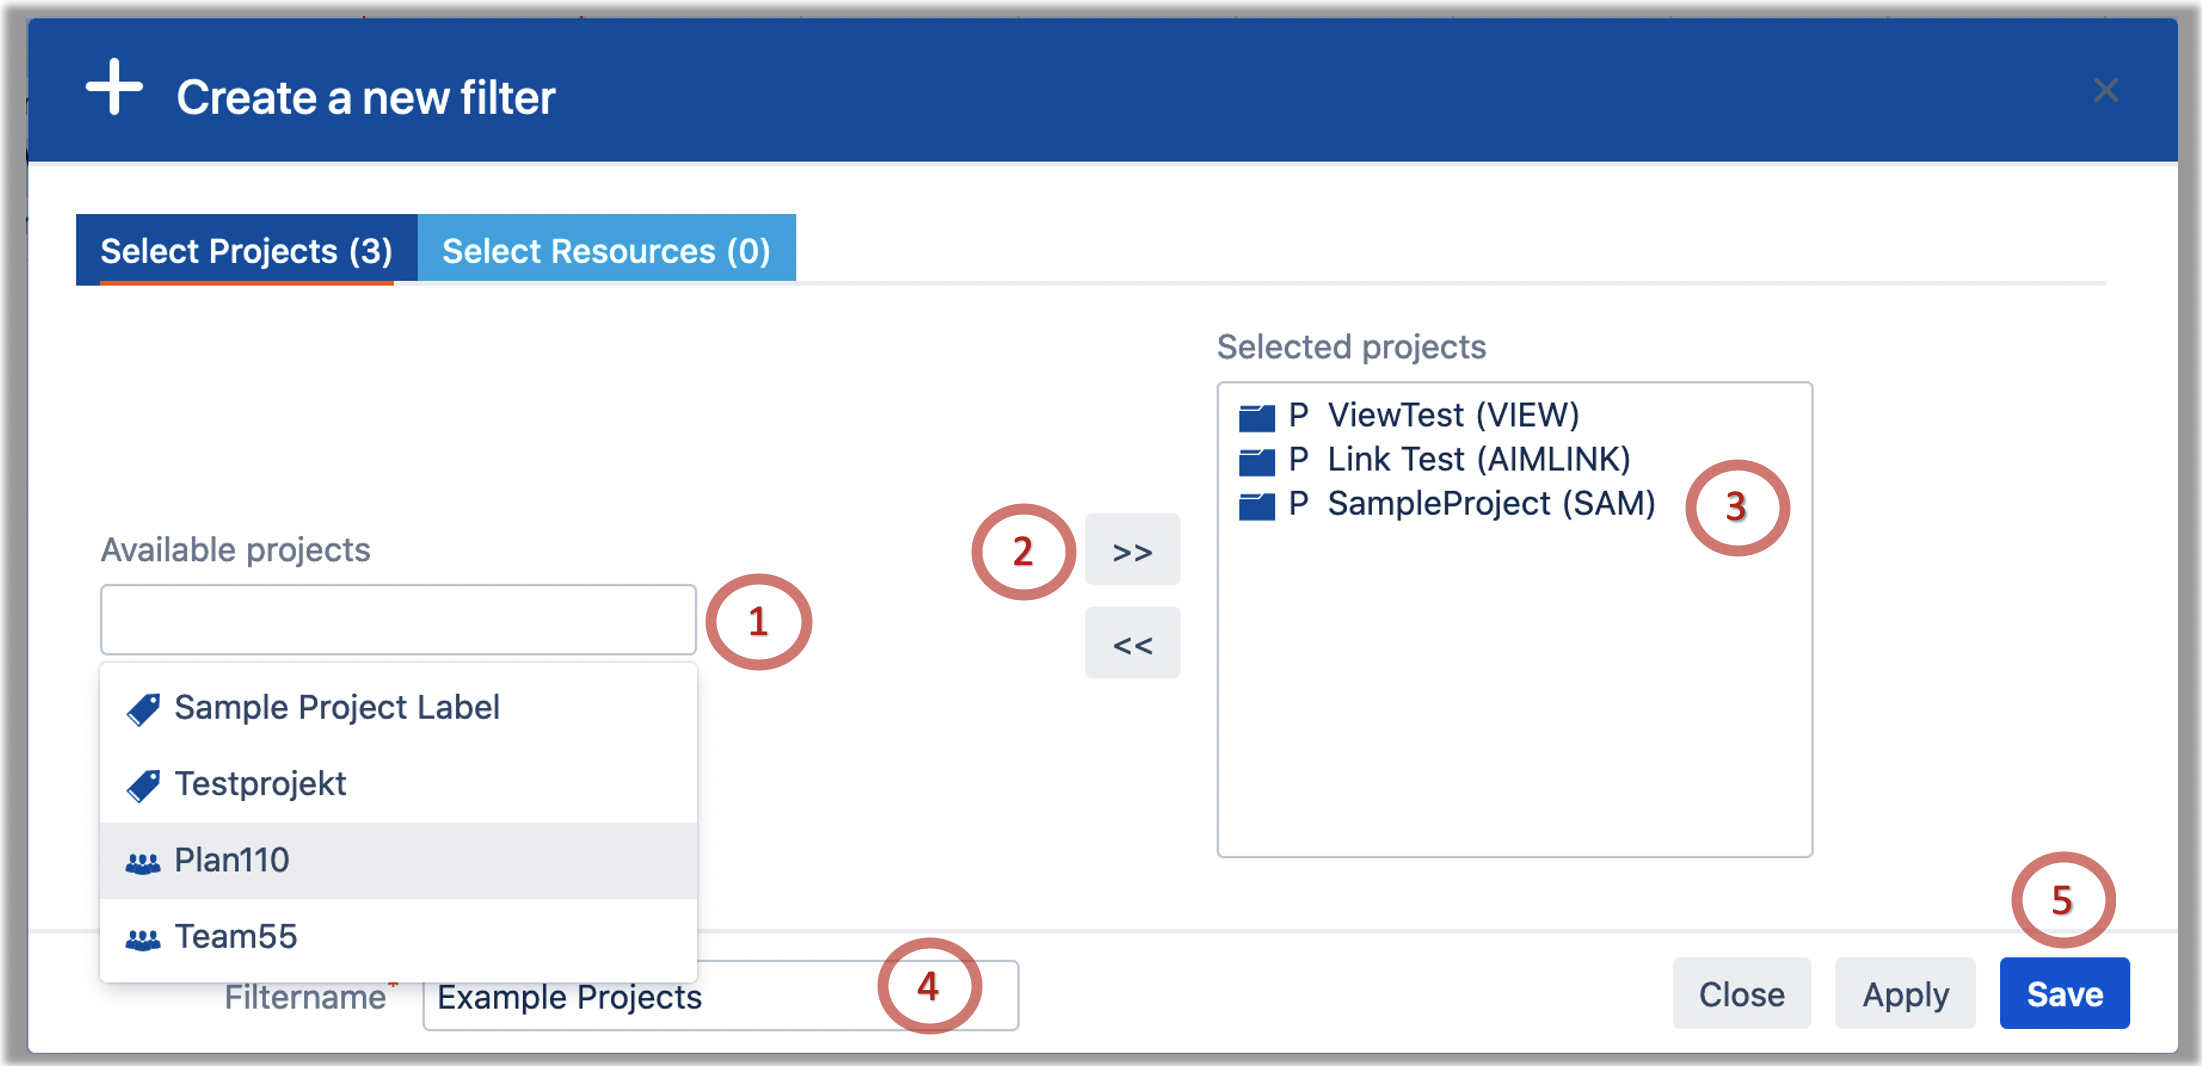 (Click to enlarge) | 1: |
Search for projects, see the administration section for detailed information on the content. 2: Select one or several |
projects out of the list |
and add / remove Resources to / from the Selection. |
3: Resources selected for the current Filter. |
4: Name for the defined Filter - mandatory to save / change the current Filter. |
5: Either close (= cancel), apply (without saving) or save / change (and apply) the current Filter. |
|
Define a mixed project and resource filter
This will fix what you see in the filter. Neither new projects nor new team members on a project will show up.
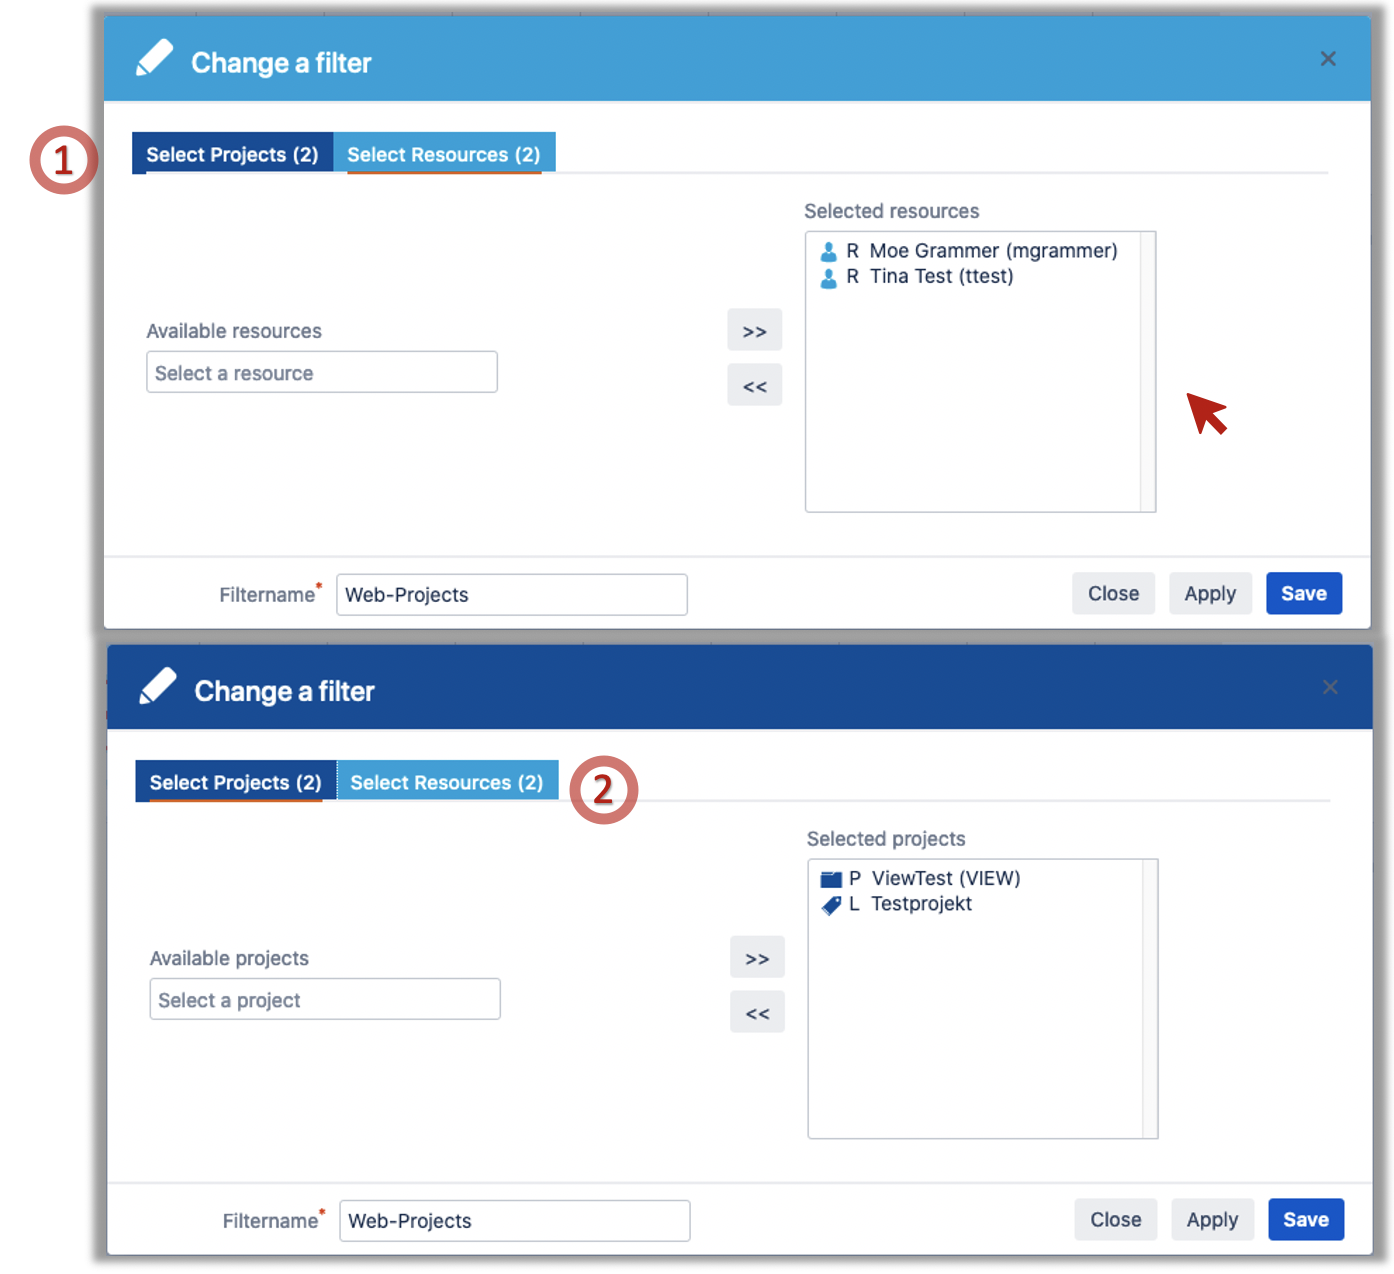 (Click to enlarge) | 1: In the header you will see how many projects have been added to the project tab 2: In the header you will see how many resources are been added to the project tab This will define a fixed content. Please be aware that though filtering the content, not all projects of the resources are shown and it may be that the sum of a project or resource is higher than what you can actually see. The default view for a mixed project is the project to resources view. |
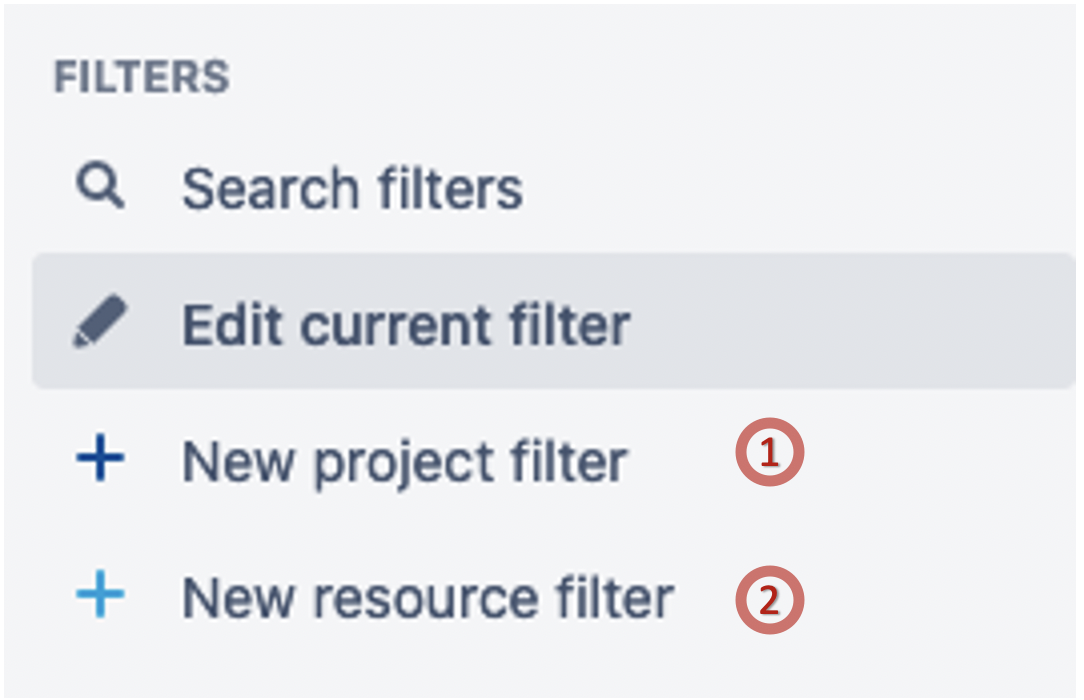
My Filters - Create, Publish & Delete Filters
|
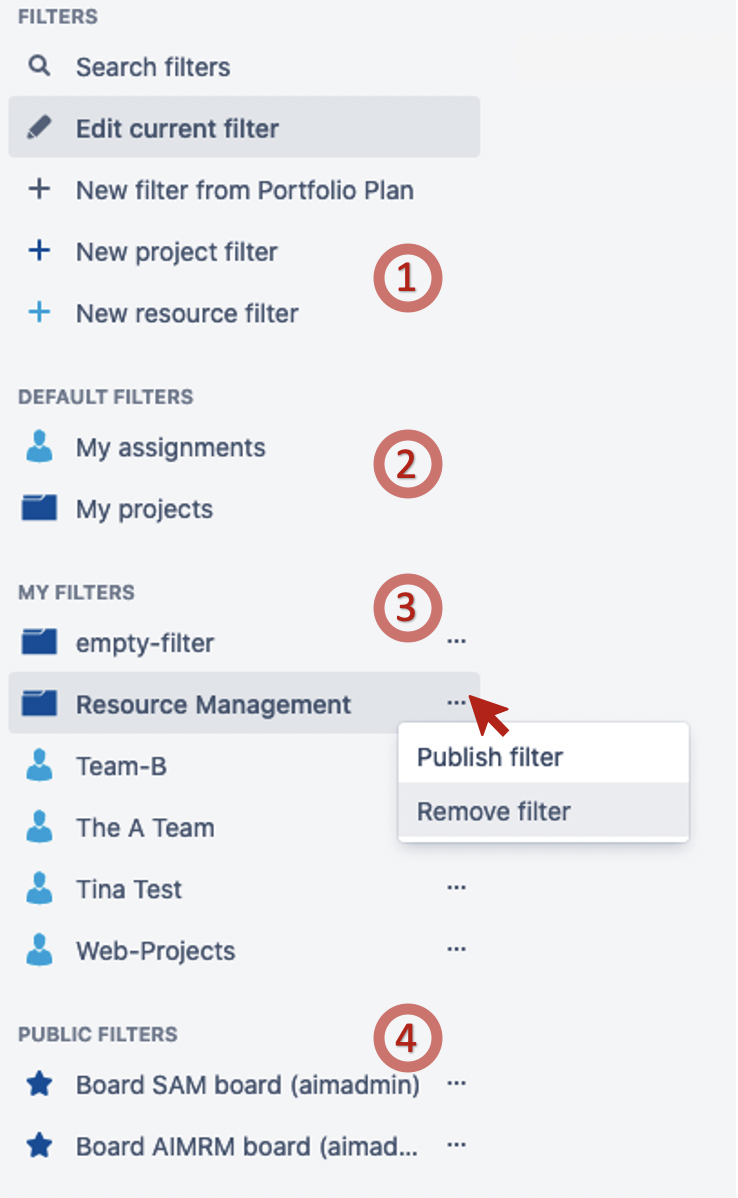

1: New Filters can be created directly in the filter area. 2: Default filters for the current user will show a temporary filter with the user as the selected user or all projects the user is assigned to in the selected projects section. 3: Each filter can be published by using the |
pull down directly located at the filter. Each filter can be deleted by using the |
pull down directly located at the filter. 4: Filter subscriptions are shown in the public filters section |
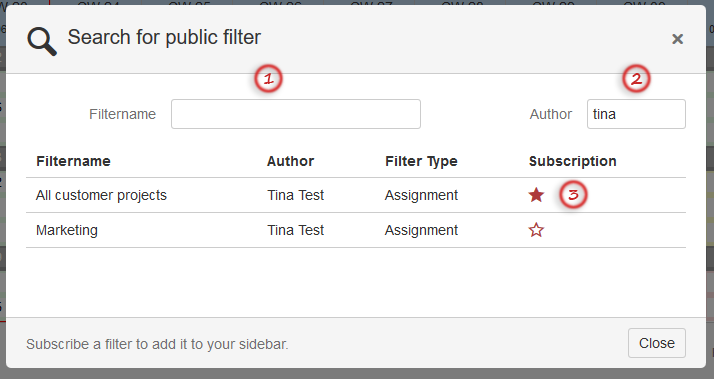
Public Filters - Search filter
...
| 1: Search for filter names 2: Search for author names and get filters that were published by the author 3: Select a filter and subscribe it by clicking the star icon. The subscribed filter will appear in the Public Filters list. |